Creating Self-Signed ECDSA SSL Certificate using OpenSSL

Before generating a private key, you’ll need to decide which elliptic curve to use. To list the supported curves run:

openssl ecparam -list_curves

The list is quite long and unless you know what you’re doing you’ll be better off choosing one of the sect* or secp*. For this tutorial I choose secp521r1 (a curve over 521bit prime).

Generating the certificate is done in two steps: First we create the private key, and then we create the self-signed X509 certificate:

openssl ecparam -name secp521r1 -genkey -param_enc explicit -out private-key.pem
openssl req -new -x509 -key private-key.pem -out server.pem -days 730

The newly created server.pem and private-key.pem are the certificate and the private key, respectively. The -param_enc explicit tells openssl to embed the full parameters of the curve in the key, as opposed to just its name. This allows clients that are not aware of the specific curve name to work with it, at the cost of slightly increasing the size of the key (and the certificate).

You can examine the key and the certificate using

openssl ecparam -in private-key.pem -text -noout
openssl x509 -in server.pem -text -noout

Most webservers expect the private-key to be chained to the certificate in the same file. So run:

cat private-key.pem server.pem > server-private.pem

And install server-private.pem as your certificate. If you don’t concatenate the private key to the certificate, at least Lighttpd will complain with the following error:

SSL: Private key does not match the certificate public key, reason: error:0906D06C:PEM routines:PEM_read_bio:no start line 
Preventing Directory Traversal in Python

Consider the following use case:

PREFIX = '/home/user/files/'
full_path = os.path.join(PREFIX, filepath)
read(full_path, 'rb')
...

Assuming that filepath is user-controlled, a malicious user user might attempt a directory traversal (like setting filepath to ../../../etc/passwd). How can we make sure that filepath cannot traverse “above” our prefix? There are of course numerous solutions to sanitizing input against directory traversalthat. The easiest way (that I came up with) to do so in python is:

filepath = os.normpath('/' + filepath).lstrip('/')

It works because it turns the path into an absolute path, normalizes it and makes it relative again. As one cannot traverse above /, it effectively ensures that the filepath cannot go outside of PREFIX.

Post updated: see the comments below for explanation of the changes.

Mozilla Persona

I came across today Mozilla Persona. It’s a Single-Sign-On (SSO) system that is similar to OpenID. While it looks like there is no need for yet-another-SSO, it does have some promising features compared to OpenID and especially OpenID provided by “Big Player” like Google and Facebook (actually Facebook doesn’t provide OpenID by similar working Facebook Connect).

The one main benefit is privacy. The first kind of privacy is related to the provider. In OpenID, the provider knows exactly where you’ve logged in too. For example, if I want to use my Google account as an OpenID to sign into a gardening forum, Google will know that I’ve signed up there and they will get notified every time I sign-in. Persona on the other hand, seems to sidestep this issue. After registering with a Persona provider (Mozilla offers one), the provider gives the user cryptographically signed token which he can present to sites he signs in to. The site can verify the validity of the certificate without telling the provider which user it wishes to validate.

Another aspect of privacy provided by Persona is our ease of creating alter-egos (and thus keep our anonymity on the net). Facebook and other OpenID like providers require extensive personal information and has real-name policy (which in case of violation can result in blocked account). Persona, by allowing you to register with any email address (think about Mailinator) it allows you to create these anonymous-persona. It also allows you more control on the kind of profile information it shares with providers.

There is last remaining issue, which still concerns me. If you use an OpenID provider, such as Google, and it decides to block your account then you lose access to all those places you authenticated to using that account. This can be worked around by setting up your own OpenID provider, but that’s not simple. I’m bot sure if Persona offers an easier way around it.

Overall, Persona looks very promising as an alternative to OpenID. If anyone has real experience with it, I would love to hear.

Securing Access to phpMyAdmin on Lighttpd via SSH

phpMyAdmin lets easily manage your MySQL databases, as such it also presents a security risk. Logging in to phpMyAdmin is done using a username and password for the database. Hence, if someone is able to either eavesdrop or guess by brute-force the username and password could wreak havoc of your server.

A possible solution to the eavesdropping problem, is to use SSL to secure the communication to the phpMyAdmin. However, SSL certificates don’t present any method to stop brute-forcing. To prevent brute-forcing attempts, you could limit access to your IP address. However, most of us don’t have static IPs at home. The solution I came up with, kinds of combines both approaches.

Instead of using SSL to encrypt the data sent, I’m using SSH and instead of limiting access to my IP address, I’ll limit access to the server’s IP address. How will it work? First we start by editing the phpMyAdmin configuration for lighttpd. This usually resides in /etc/lighttpd/conf-enabled/50-phpmyadmin.conf. At the top of the file you’ll find the following lines:

alias.url += (
        "/phpmyadmin" => "/usr/share/phpmyadmin",
)

These lines define the mapping to the phpmyadmin installation, without it the phpMyAdmin wouldn’t be accessible. We use lighttpd’s conditional configuration to limit who is able to use that mapping by changing the above lines to:

$HTTP["remoteip"] == "85.25.120.32" {
        alias.url += (
                "/phpmyadmin" => "/usr/share/phpmyadmin",
        )
}

This limit access to the phpMyAdmin only to clients whose IP is the server’s IP (of course you’ll need to change that IP to your server’s IP). This stops curtails any brute-forcing attempts, as only someone trying to access the phpMyAdmin from the server itself will succeed.

But how can we “impersonate” the server’s IP when we connect from home? The easiest solution would be to use to the SOCKS proxy provided by SSH.

ssh user@server.com -D 1080

This will setup a SOCKS proxy on port 1080 (locally) that will tunnel traffic through your server. The next step is to instruct your browser of OS to use that proxy (in Firefox it can be done via Preferences->Advanced->Network->Connection Settings, it can also be defined globally via Network Settings->Network Proxy under Gnome). This achieves both of our goals. We are now able to connect to the server while using its own IP and our connection to the server is encrypted using SSH.

This method can be used to secure all kinds of sensitive applications. We could have achieved the same thing by using a VPN, but it’s more hassle to setup compared to SSH which is available on any server.

Manually Install SSL Certificate in Android Jelly Bean

Apparently it’s pretty easy, but there are some pitfalls. The first step is to export the certificate as a DER encoded X.509 certificate. This can be done using Firefox (on a PC) by clicking on the SSL’s lock sign in the address bar, More Information -> View Certificate -> Details -> Export. The exported certificate needs to be saved on the root directory of the internal storage of the phone, with *.cer extension (or *.crt). Other extensions will not work.

Afterwards, on the phone, click on “Install from device storage” under Settings->Security->Credential Storage. If you did everything as you should at the previous step, it will display the certificate name, and ask you to confirm its installation. If you’ve exported the certificate as the wrong format, gave it the wrong extension or placed it somewhere else than the root of the internal storage, it will display the following error:

No certificate file found in USB storage

If you see it, just make sure you are exporting the certificate correctly and saving it at the right place.

More details: Work with certificates (Geared towards Galaxy Nexus, but should apply to any Android 4.0 and above.

Updated Aug 2015: Fixed a broken link.

Some Thoughts About Android’s Full Disk Encryption

One of the new features touted by ICS is full-disk encryption (actually it was first available in Android 3). The first look is promising. The android developers went with dm-crypt as the underlying transparent disk encryption subsystem, which is the de-facto way to perform full-disk-encryption in Linux nowadays. This ensures both portability of the encrypted file systems and tried-and-tested implementation. The cipher itself is 128-bit AES in a ESSIV mode, and the encryption key is derived from the password using PBKDF2 (actually it’s the key that encrypts the actual encryption key, allowing fast password changes). So where do I think it went wrong?

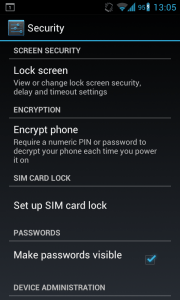
Enabling the full disk encryption.

Continue reading Some Thoughts About Android’s Full Disk Encryption

Security Vulnerabilities in the Imagin Photo Gallery

Following a friend’s request I’ve did a short security review of the Imagin photo gallery couple of weeks ago. I’ve looked at the newest version, v3 beta5, but the vulnerabilities may also apply to older versions. So here they are, from least to most important in my opinion.
Continue reading Security Vulnerabilities in the Imagin Photo Gallery

WordPress Administration over SSL on Lighttpd

In this tutorial we’ll walk through the steps of enabling SSL (https) for the WordPress’ admin panel when using Lighttpd as a webserver. The tutorial consists of two stages, the first is enabling SSL at the Lighttpd level and the second is in the WordPress level.


Continue reading WordPress Administration over SSL on Lighttpd